
Магнитола jvc kd g521 инструкция
Добавил пользователь Евгений Кузнецов Обновлено: 19.09.2024
Наша цель - обеспечить Вам самый быстрый доступ к руководству по эксплуатации устройства JVC KD-G521 . Пользуясь просмотром онлайн Вы можете быстро просмотреть содержание и перейти на страницу, на которой найдете решение своей проблемы с JVC KD-G521 .
Для Вашего удобства
Если просмотр руководства JVC KD-G521 непосредственно на этой странице для Вас неудобен, Вы можете воспользоваться двумя возможными решениями:
- Полноэкранный просмотр -, Чтобы удобно просматривать инструкцию (без скачивания на компьютер) Вы можете использовать режим полноэкранного просмотра. Чтобы запустить просмотр инструкции JVC KD-G521 на полном экране, используйте кнопку Полный экран .
- Скачивание на компьютер - Вы можете также скачать инструкцию JVC KD-G521 на свой компьютер и сохранить ее в своем архиве. Если ты все же не хотите занимать место на своем устройстве, Вы всегда можете скачать ее из ManualsBase.
Печатная версия
Многие предпочитают читать документы не на экране, а в печатной версии. Опция распечатки инструкции также предусмотрена и Вы можете воспользоваться ею нажав на ссылку, находящуюся выше - Печатать инструкцию . Вам не обязательно печатать всю инструкцию JVC KD-G521 а только некоторые страницы. Берегите бумагу.
Резюме
Ниже Вы найдете заявки которые находятся на очередных страницах инструкции для JVC KD-G521 . Если Вы хотите быстро просмотреть содержимое страниц, которые находятся на очередных страницах инструкции, Вы воспользоваться ими.
Краткое содержание страницы № 1
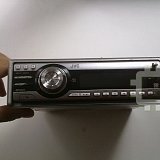
CD RECEIVER
CD-RECEIVER
РЕСИВЕР С ПРОИГРЫВАТЕЛЕМ КОМПАКТ-ДИСКОВ
KD-G521
For canceling the display demonstration, see page 6.
Zum Abbrechen der Displaydemonstration siehe Seite 6.
Информацию об отмене демонстрации функций дисплея см. на стр. 6.
For installation and connections, refer to the separate manual.
Für den Einbau und die Anschlüsse siehe das eigenständige Handbuch.
Указания по установке и выполнению соединений приводятся в отдельной инструкции.
INSTRUCTIONS
BEDIENUNGSANLEITUNG
ИНСТРУК
Краткое содержание страницы № 2
Thank you for purchasing a JVC product. Please read all instructions carefully before operation, to ensure your complete understanding and to obtain the best possible performance from the unit. IMPORTANT FOR LASER PRODUCTS 1. CLASS 1 LASER PRODUCT 2. CAUTION: Do not open the top cover. There are no user serviceable parts inside the unit; leave all servicing to qualified service personnel. 3. CAUTION: Visible and invisible laser radiation when open and interlock failed or defeated. Avoid dire
Краткое содержание страницы № 3
How to read this manual CONTENTS • Button operations are mainly explained with the illustrations in the table below. • Some related tips and notes are explained in Control panel . 4 “More about this unit” (see pages 19 – 21). Remote controller — RM-RK50 . 5 Getting started . 6 Press briefly. Basic operations . 6 Radio operations . 7 P
Краткое содержание страницы № 4
Control panel — KD-G612/KD-G611/KD-G511 Control panel Parts identification Display window 1 5 (up) / ∞ (down) buttons Display window 2 T/P TP/PTY (traffic programme/ a Main display programme type) button s Disc information indicators—TAG (ID3 3 D DISP (display) button Tag), (folder), (track/file) 4 S SEL (select) button d EQ (equalizer) indicator 5 • Control dial f Sound mode (C-EQ: custom equalizer) • (standby/on attenuator) button indicators—ROCK, CLASSIC, POPS, 6 Display window HIP HOP
Краткое содержание страницы № 5
Main elements and features Remote controller — RM-RK50 Installing the lithium coin battery (CR2025) 1 (standby/on/attenuator) button • Turns the power on if pressed briefly or attenuates the sound when power is on. • Turns the power off if pressed and held. Aim the remote controller directly at the 2 5 U (up) / D (down) ∞ buttons remote sensor on the unit. Make sure there is • Changes the FM/AM/DAB bands with no obstacle in between. 5 U only. • Changes the preset stations (or services
Краткое содержание страницы № 6
@ Adjust the sound as you want. (See Getting started pages 13 and 14.) Basic operations To drop the volume in a moment (ATT) To restore the sound, ~ Turn on the power. press it again. To turn off the power Ÿ • Select “CD-CH” when using an Apple Basic settings iPod or a JVC D. player (see page 17). ® • See also “General settings — PSM” on pages 14 – 16. iPod is a trademark of Apple Computer, Inc., registered in the U.S. 1 and other countries. * You cannot select these sources if they 2
Краткое содержание страницы № 7
When an FM stereo broadcast is hard to Radio operations receive ~ Ÿ Lights up when monaural mode is activated. Reception improves, but stereo effect will be Lights up when receiving an FM stereo broadcast with lost. sufficient signal strength. To restore the stereo effect, repeat the same procedure. “MONO OFF” appears and the MO indicator goes off. Selected band appears. Storing stations in memory ! Start searching for a station. You can preset six stations for each band. FM station au
Краткое содержание страницы № 8
Manual presetting FM RDS operations Ex.: Storing FM station of 92.5 MHz into preset number 4 of the FM1 band. What you can do with RDS RDS (Radio Data System) allows FM stations 1 to send an additional signal along with their regular programme signals. By receiving the RDS data, this unit can do the following: 2 • Programme Type (PTY) Search (see the following) • TA (Traffic Announcement) and PTY Standby Receptions (see pages 9 and 15) 3 • Tracing the same programme automatically —Net
Краткое содержание страницы № 9
! Start searching for your favorite Using the standby receptions programme. TA Standby Reception TA Standby Reception allows the unit to switch temporarily to Traffic Announcement (TA) from any source other than AM. The volume changes to the preset TA volume level (see page 15). To activate TA Standby Reception If there is a station broadcasting a programme of the same PTY code as you The TP (Traffic Programme) have selected, that station is tuned in. indicator either lights up or fla
Краткое содержание страницы № 10
Tracing the same programme— Disc operations Network-Tracking Reception Playing a disc in the unit When driving in an area where FM reception is not sufficient enough, this unit automatically tunes in to another FM RDS station of the same network, possibly broadcasting the same programme with stronger signals (see the illustration below). When shipped from the factory, Network- Tracking Reception is activated. All tracks will be played repeatedly until you To change the Network-Tracking Re
Краткое содержание страницы № 11
About MP3 and WMA discs To locate a particular track (for CD) or folder (for MP3 or WMA discs) directly MP3 and WMA “tracks” (words “file” and “track” are used interchangeably) are recorded in “folders.” To select a number from 01 – 06: About the CD changer It is recommended to use a JVC MP3- compatible CD changer with your unit. • You can also connect other CH-X series CD To select a number from 07 – 12: changers (except CH-X99 and CH-X100). These units are not compatible with MP3 discs.
Краткое содержание страницы № 12
Other main functions Changing the display information Skipping a track quickly during play While playing an audio CD or a CD Text Only possible on JVC MP3-compatible CD changer • For MP3 or WMA disc, you can skip a track within the same folder. Ex.: To select track 32 while playing track 6 2 * While playing an MP3 or WMA disc • When “TAG DISP” is set to “TAG ON” 1 (see page 16) 2 Each time you press the button, you can • When “TAG DISP” is set to “TAG OFF” skip 10 tracks. • After the l
Краткое содержание страницы № 13
Selecting the playback modes Sound adjustments You can use only one of the following playback You can select a preset sound mode suitable to modes at a time. the music genre (C-EQ: custom equalizer). 1 1 2 Select your desired playback mode. 2 7 Repeat play Preset values BAS TRE LOUD (bass) (treble) (loudness) Indication (For) Mode Plays repeatedly USER 00 00 OFF (Flat sound) TRK RPT : The current track. 1 FLDR RPT* : All tracks of the current ROCK +03 +01 ON folder. (Rock or disco music)
Краткое содержание страницы № 14
2 General settings — PSM You can change PSM (Preferred Setting Mode) items listed in the table that follows. Indication pattern changes as you adjust the level. 1 Ex.: When “TRE” is selected 2 Select a PSM item. Indication [Range] 1 BAS* (bass) Adjust the bass. [–06 to +06] 1 TRE* (treble) Adjust the treble. [–06 to +06] 2 FAD* (fader) Ex.: When you select “DIMMER” Adjust the front and rear speaker balance. [R06 to F06] 3 Adjust the PSM item selected. BAL (balance) Adjust the left and right
Краткое содержание страницы № 15
Indications Selectable settings, [reference page] DEMO DEMO ON : [Initial]; Display demonstration will be activated Display demonstration automatically if no operation is done for about 20 seconds, [6]. DEMO OFF : Cancels. CLOCK H 0 – 23 (1 – 12), [6] Hour adjustment [Initial: 0 (0:00)] CLOCK M 00 – 59, [6] Minute adjustment [Initial: 00 (0:00)] 24H/12H 12H O 24H, [6] Time display mode [Initial: 24H] CLK ADJ AUTO : [Initial]; The built-in clock is automatically adjusted Clock adjustment us
Краткое содержание страницы № 16
Indications Selectable settings, [reference page] 1 DAB VOL* You can adjust the volume level (VOL –12 — VOL +12) of DAB DAB volume adjustment tuner to match the FM sound level and store it in memory. [Initial: VOL 00] LEVEL ON : [Initial]; Activates the audio level indicator. Audio level meter OFF : Cancels; sound mode indicator is shown. DIMMER AUTO : [Initial]; Dims the display when you turn on the Dimmer headlights. ON : Activates dimmer. OFF : Cancels. TEL MUTING 1/MUTING 2 : Select eithe
Краткое содержание страницы № 17
• CD changer jack on the rear using KS-U57 or KS-U58 External component If “EXT IN” does not appear, see page operations 16 and select the external input (“EXT IN”). You can connect an external component to. • CD changer jack on the rear using: – Line Input Adapter—KS-U57 (not supplied) or AUX Input Adapter—KS-U58 (not supplied) for any other components (except iPod and D. player). • CD changer jack on the rear using – Interface adapter for iPod —KS-PD100 interface adapter for iPod
Краткое содержание страницы № 18
⁄ Select a service (either primary or DAB tuner operations secondary) to listen to. What is DAB system? Digital Audio Broadcasting (DAB) can deliver digital quality sound without any annoying interference and signal distortion. To tune in to an ensemble manually Furthermore, it can carry text, pictures, and Start searching for an ensemble, as in step ! on data. When transmitting, DAB combines the left column. several programmes (called “services”) to 1 form one “ensemble.” In addition
Краткое содержание страницы № 19
Tuning in to a preset DAB service More about this unit 1 Basic operations Turning on the power • By pressing SOURCE on the unit, you can 2 Select the preset DAB service also turn on the power. If the source is ready, (primary) number (1 – 6) you want. playback also starts. Turning off the power • If you turn off the power while listening to a disc, disc play will start from where playback If the selected primary service has some has been stopped previously, next time you secondary servi
Краткое содержание страницы № 20
• If a Traffic Announcement is received by TA Playing a disc Standby Reception, the volume level (TA VOL) • While fast-forwarding or reversing on an MP3 automatically changes to the preset level. or WMA disc, you can only hear intermittent • When Alternative Frequency Reception sounds. is activated (with AF selected), Network- Tracking Reception is also activated Playing a CD-R or CD-RW automatically. On the other hand, Network- • Use only “finalized” CD-Rs or CD-RWs. Tracking Reception ca
Zum Abbrechen der Displaydemonstration siehe Seite 6.
Информацию об отмене демонстрации функций дисплея см. на стр. 6.
For installation and connections, refer to the separate manual.
Für den Einbau und die Anschlüsse siehe das eigenständige Handbuch.
Указания по установке и выполнению соединений приводятся в отдельной инструкции.
ИНСТРУКЦИИ ПО ЭКСПЛУАТАЦИИ
C o v e r _ K D - G 5 2 1 [ E Y ] 0 0 6 A _ f . i n d d 2 Cover_KD-G521[EY]006A_f.indd 2 9 / 8 / 0 5 5 : 0 9 : 3 9 P M 9/8/05 5:09:39 PM

Thank you for purchasing a JVC product.
Please read all instructions carefully before operation, to ensure your complete understanding and to
obtain the best possible performance from the unit.
IMPORTANT FOR LASER PRODUCTS
1. CLASS 1 LASER PRODUCT
2. CA UT ION: Do not open the top cover. There are no user serviceable parts inside the unit; leave
all servicing to qualified service personnel.
3. CAUTION: Visible and invisible laser radiation when open and interlock failed or defeated.
Avoid direct exposure to beam.
4. REPRODUCTION OF LABEL: CAUTION LABEL, PLACED OUTSIDE THE UNIT.
How to reset your unit
How to use the M MODE button
If you press M MODE, the unit goes into
functions mode, then the number buttons
and 5 / ∞ buttons work as different function
Ex.: When number button 2 works as
MO (monaural) button.
Your preset adjustments will also be erased.
How to forcibly eject a disc
“PLEASE” and “EJECT” appear alternately on
Time countdown indicator
To use these buttons for their original
functions again after pressing M MODE, wait
for 5 seconds without pressing any of these
buttons until the functions mode is cleared or
• If this does not work, reset your unit.
press M MODE again.
• Be careful not to drop the disc when it ejects.
How to detach/attach the control panel
E N 0 2 - 0 5 K D - G 5 2 1 [ E Y ] f . i n d d 2 EN02-05KD-G521[EY]f.indd 2 9 / 1 6 / 0 5 1 2 : 0 3 : 3 9 P M 9/16/05 12:03:39 PM

How to read this manual
CONTENTS
• Button operations are mainly explained with
the illustrations in the table below.
• Some related tips and notes are explained in
Control panel . 4
“More about this unit” (see pages 19 – 21).
Getting started . 6
Basic operations . 6
Radio operations . 7
FM RDS operations . 8
Searching for your favorite FM RDS programme . 8
Disc operations . 10
Playing a disc in the unit . 10
Playing discs in the CD changer . 10
Press and hold until your
Sound adjustments . 13
desired response begins.
General settings — PSM . 14
External component operations
Press and hold both
buttons at the same time.
DAB tuner operations
More about this unit . 19
The following marks are used to indicate.
: Built-in CD player operations.
: External CD changer operations.
Indicator displayed for the
For security reasons, a numbered ID card
is provided with this unit, and the same ID
number is imprinted on the unit’s chassis.
Keep the card in a safe place, as it will help the
If you need to operate the unit while driving,
authorities to identify your unit if stolen.
be sure to look ahead carefully or you may be
involved in a traffic accident.
• Do not raise the volume level too much, as
this will block outside sounds, making driving
Caution on volume setting:
• Stop the car before performing any
Discs produce very little noise compared
with other sources. Lower the volume
Temperature inside the car.
before playing a disc to avoid damaging
If you have parked the car for a long time in hot
the speakers by the sudden increase of the
or cold weather, wait until the temperature in
the car becomes normal before operating the
E N 0 2 - 0 5 K D - G 5 2 1 [ E Y ] f . i n d d 3 EN02-05KD-G521[EY]f.indd 3 9 / 1 6 / 0 5 1 2 : 0 3 : 4 1 P M 9/16/05 12:03:41 PM

Control panel — KD-G612/KD-G611/KD-G511
Control panel
1 5 (up) / ∞ (down) buttons
2 T/P TP/PTY (traffic programme/
programme type) button
s Disc information indicators—TAG (ID3
3 D DISP (display) button
4 S SEL (select) button
d EQ (equalizer) indicator
5 • Control dial
f Sound mode (C-EQ: custom equalizer)
(standby/on attenuator) button
indicators—ROCK, CLASSIC, POPS,
6 Display window
HIP HOP, JAZZ, USER
7 Remote sensor
also works as the time countdown
• DO NOT expose the remote sensor to
indicator and level meter during play (see
strong light (direct sunlight or artificial
g Tuner reception indicators—ST (stereo),
8 0 (eject) button
h Disc type indicators—WMA, MP3
(control panel release) button
j Playback source indicators—
q SOURCE button
CH: Lights up only when CD-CH is selected
as the playback source.
e Number buttons
DISC: Lights up for the built-in CD player.
r EQ (equalizer) button
k RDS indicators—TP, PTY, AF, REG
t MO (monaural) button
l Playback mode / item indicators—
y SSM (Strong-station Sequential Memory)
u RPT (repeat) button
/ LOUD (loudness) indicator
i RND (random) button
z Source display / Volume level indicator
o M MODE button
x Tr (track) indicator
AUX (auxiliary) input jack
E N 0 2 - 0 5 K D - G 5 2 1 [ E Y ] f . i n d d 4 EN02-05KD-G521[EY]f.indd 4 9 / 1 6 / 0 5 1 2 : 0 3 : 4 2 P M 9/16/05 12:03:42 PM

OFF : Отмена ; отображение индикатора режима звучания.
[По умолчанию]; Затемнение дисплея при
ON : Включение затемнения.
MUTING 1/MUTING 2: Выберите любой из параметров,
обеспечивающий отключение звука при
использовании сотового телефона.
[По умолчанию]; Отмена.
[По умолчанию]; Однократная прокрутка
информации на диске.
Повторение прокрутки (с интервалом 5 секунд).
• При нажатии кнопки D DISP в течение более одной секунды
происходит включение функции прокрутки информации на
дисплее независимо от имеющейся настройки.
[По умолчанию]; Использование устройства
Ввод внешних сигналов
автоматической смены компакт-дисков компании
JVC, [10], проигрывателя Apple iPod, проигрывателя
[17], и/или тюнера DAB, [18].
EXT IN : Используется любое внешнее устройство, [17].
A.ADJ 00 – A.ADJ 05: Настройка уровня дополнительного входного
сигнала во избежание неожиданного увеличения
уровня выходного сигнала при переходес внешнего
устройства, подключенного к входному разъему AUX
на панели управления, на другой источник.
[По умолчанию: A.ADJ 00]
[ По умолчанию ] ; Отображение тега ID3 во время
воспроизведения дорожек MP3/WMA, [12].
TAG OFF : Отмена.
Можно изменить максимальный уровень громкости данного
VOL 00 – VOL 30 (Выберите этот параметр для
предотвращения повреждения динамика, если
максимальная мощность динамика меньше 50 Вт.)
HIGH PWR : [По умолчанию]; VOL 00 – VOL 50
Отображается только при подключении тюнера DAB.
Некоторые буквы или символы не будут отображаться правильно (или не будут
отображаться) на дисплее.
Отображается только при выборе одного из следующих источников—FM, AM, CD или AUX IN.
R U 1 2 - 1 7 K D - G 5 2 1 [ E Y ] f . i n d d 1 6 RU12-17KD-G521[EY]f.indd 16 9 / 1 9 / 0 5 3 : 5 4 : 1 5 P M 9/19/05 3:54:15 PM
Посмотреть инструкция для JVC KD-G521 бесплатно. Руководство относится к категории Автомагнитолы, 2 человек(а) дали ему среднюю оценку 7.6. Руководство доступно на следующих языках: английский. У вас есть вопрос о JVC KD-G521 или вам нужна помощь? Задайте свой вопрос здесь
Нужна помощь?
У вас есть вопрос о JVC а ответа нет в руководстве? Задайте свой вопрос здесь Дай исчерпывающее описание проблемы и четко задайте свой вопрос. Чем детальнее описание проблемы или вопроса, тем легче будет другим пользователям Samsung Galaxy A7 предоставить вам исчерпывающий ответ.
Количество вопросов: 0
Технические характеристики JVC KD-G521
Ниже вы найдете технические характеристики изделия и руководства по эксплуатации JVC KD-G521.
| Бренд | JVC |
| Модель | KD-G521 |
| Изделие | Автомагнитола |
| Язык | английский |
| Тип файла |
Часто задаваемые вопросы
Не можете найти ответ на свой вопрос в руководстве? Вы можете найти ответ на свой вопрос ниже, в разделе часто задаваемых вопросов о JVC KD-G521.
FM означает "частотная модуляция", AM - "амплитудная модуляция". Основная разница между FM- и AM-радиостанциями состоит в качестве звука.
Уровень звука выше 80 децибел может нанести вред слуху. Уровень звука выше 120 децибел может нанести прямое повреждение слуху. Вероятность повреждения слуха зависит от частоты и продолжительности прослушивания.
Если автомобильный радиоприемник не включен, на него не будет подаваться питание. Убедитесь, что красный провод подключен к контактному источнику питания, а желтый провод — к источнику питания постоянной мощности.
Для удаления отпечатков пальцев лучше всего использовать слегка влажную салфетку для уборки или мягкую чистую ткань. Пыль в труднодоступных местах лучше всего удаляется потоком сжатого воздуха.
Bluetooth - это способ обмена данными по беспроводной сети между электронными устройствами с помощью радиоволн. Расстояние между двумя устройствами обменивающимися данными в большинстве случаев составляет не более десяти метров.
К сожалению, у нас нет руководства для JVC KD-G521, доступного в русский. Это руководство доступно в английский.
Похожие руководства по эксплуатации

JVC KD-R521

JVC KD-R431

JVC KD-G821
JVC KD-G531

JVC KD-G721
ManualsPDF . ru

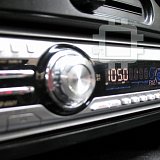
For canceling the display demonstration, see page 4. / Pour annuler la démonstration des affichages, référez-vous à la page 4.
INSTRUCTIONS
MANUEL D’INSTRUCTIONS For installation and connections, refer to the separate manual. Pour l’installation et les raccordements, se référer au manuel séparé.
Having TROUBLE with operation?
Please reset your unit
Vous avez des PROBLÈMES de fonctionnement?
Réinitialisez votre appareil
CoverRear_KD-R521_003A_1.indd 1-2 CoverRear_KD-R521_003A_1.indd 1-2 9/7/10 5:20:05 PM 9/7/10 5:20:05 PM
Инструкция
Посмотреть инструкция для JVC KD-R521 бесплатно. Руководство относится к категории Автомагнитолы, 2 человек(а) дали ему среднюю оценку 8.9. Руководство доступно на следующих языках: английский. У вас есть вопрос о JVC KD-R521 или вам нужна помощь? Задайте свой вопрос здесь
Нужна помощь?
У вас есть вопрос о JVC а ответа нет в руководстве? Задайте свой вопрос здесь Дай исчерпывающее описание проблемы и четко задайте свой вопрос. Чем детальнее описание проблемы или вопроса, тем легче будет другим пользователям Samsung Galaxy A7 предоставить вам исчерпывающий ответ.
Количество вопросов: 0
Технические характеристики JVC KD-R521
Ниже вы найдете технические характеристики изделия и руководства по эксплуатации JVC KD-R521.
| Бренд | JVC |
| Модель | KD-R521 |
| Изделие | Автомагнитола |
| Язык | английский |
| Тип файла |
| MP3-воспроизведение | Да |
| CD-R воспроизведение | Да |
| Воспроизведение CD-RW | Да |
| Количество полос эквалайзера | 3 |
| Выходная мощность | 200 W |
| Совместимость с iPod | Да |
| Выходные звуковые каналы | 4.0 канала |
| Максимальная мощность на канал | 50 W |
Часто задаваемые вопросы
Не можете найти ответ на свой вопрос в руководстве? Вы можете найти ответ на свой вопрос ниже, в разделе часто задаваемых вопросов о JVC KD-R521.
FM означает "частотная модуляция", AM - "амплитудная модуляция". Основная разница между FM- и AM-радиостанциями состоит в качестве звука.
Уровень звука выше 80 децибел может нанести вред слуху. Уровень звука выше 120 децибел может нанести прямое повреждение слуху. Вероятность повреждения слуха зависит от частоты и продолжительности прослушивания.
Если автомобильный радиоприемник не включен, на него не будет подаваться питание. Убедитесь, что красный провод подключен к контактному источнику питания, а желтый провод — к источнику питания постоянной мощности.
Для удаления отпечатков пальцев лучше всего использовать слегка влажную салфетку для уборки или мягкую чистую ткань. Пыль в труднодоступных местах лучше всего удаляется потоком сжатого воздуха.
Bluetooth - это способ обмена данными по беспроводной сети между электронными устройствами с помощью радиоволн. Расстояние между двумя устройствами обменивающимися данными в большинстве случаев составляет не более десяти метров.
К сожалению, у нас нет руководства для JVC KD-R521, доступного в русский. Это руководство доступно в английский.
Похожие руководства по эксплуатации

JVC KD-R421

JVC KD-R321

JVC KD-R531
JVC KD-R431

JVC KD-R45
ManualsPDF . ru
Читайте также: