
Настроить магнитолу jvc kd r531
Добавил пользователь Владимир З. Обновлено: 20.09.2024
Наша цель - обеспечить Вам самый быстрый доступ к руководству по эксплуатации устройства JVC Car Stereo System KD-R531 . Пользуясь просмотром онлайн Вы можете быстро просмотреть содержание и перейти на страницу, на которой найдете решение своей проблемы с JVC Car Stereo System KD-R531 .
Для Вашего удобства
Если просмотр руководства JVC Car Stereo System KD-R531 непосредственно на этой странице для Вас неудобен, Вы можете воспользоваться двумя возможными решениями:
- Полноэкранный просмотр -, Чтобы удобно просматривать инструкцию (без скачивания на компьютер) Вы можете использовать режим полноэкранного просмотра. Чтобы запустить просмотр инструкции JVC Car Stereo System KD-R531 на полном экране, используйте кнопку Полный экран .
- Скачивание на компьютер - Вы можете также скачать инструкцию JVC Car Stereo System KD-R531 на свой компьютер и сохранить ее в своем архиве. Если ты все же не хотите занимать место на своем устройстве, Вы всегда можете скачать ее из ManualsBase.
Печатная версия
Многие предпочитают читать документы не на экране, а в печатной версии. Опция распечатки инструкции также предусмотрена и Вы можете воспользоваться ею нажав на ссылку, находящуюся выше - Печатать инструкцию . Вам не обязательно печатать всю инструкцию JVC Car Stereo System KD-R531 а только некоторые страницы. Берегите бумагу.
Резюме
Ниже Вы найдете заявки которые находятся на очередных страницах инструкции для JVC Car Stereo System KD-R531 . Если Вы хотите быстро просмотреть содержимое страниц, которые находятся на очередных страницах инструкции, Вы воспользоваться ими.
Краткое содержание страницы № 1
ENGLISH
FRANÇAIS
KD-R531/KD-R432/KD-R431
CD RECEIVER / RÉCEPTEUR CD
For canceling the display demonstration, see page 4. /
Pour annuler la démonstration des affichages, référez-vous à la page 4.
For installation and connections, refer to the separate manual.
Pour l’installation et les raccordements, se référer au manuel séparé.
INSTRUCTIONS
MANUEL D’INSTRUCTIONS
GET0767-003A
[E/EU]��������������������������������������������������������������������������������������������������������������������
Краткое содержание страницы № 2
Thank you for purchasing a JVC product. Please read all instructions carefully before operation, to ensure your complete understanding and to obtain the best possible performance from the unit. IMPORTANT FOR LASER PRODUCTS 1. CLASS 1 LASER PRODUCT 2. CAUTION: Do not open the top cover. There are no user serviceable parts inside the unit; leave all servicing to qualified service personnel. 3. CAUTION: Visible and/or invisible class 1M laser radiation when open. Do not view directly with optical i
Краткое содержание страницы № 3
How to attach/detach the Contents control panel Preparation . 4 Canceling the display demonstration Setting the clock Basic operations . 4 Radio . 6 CD/USB . 8 How to reset your unit iPod/iPhone (KD-R531 only) . 9 Your pr
Краткое содержание страницы № 4
Preparation Preparation Canceling the display Setting the clock demonstration 1 (Hold) The display demonstration is always turned on unless you cancel it. 2 Select . 1 (Hold) 2 3 Select . (Initial setting) 3 Select . 4 Adjust the hour. 4 (Initial setting) Press MENU to exit. 5 Adjust the minute. 6 Select . 7 Select or . 8 Press MENU to exit. Basic operations Display information Changes the display information. (Press) Scrolls the current di
Краткое содержание страницы № 5
Basic operations Control panel Control dial Display window Loading slot Ejects the disc Detaches the panel Front AUX input jack USB input terminal Remote sensor You can control this unit with an optionally purchased remote control, RM-RK52 (A page 15). When you press or hold the following button(s). Button General function Turns on. Turns off. (Hold) /SOURCE Press the /SOURCE button on the control panel and turn the control dial within 2 seconds to select the source. Press repeatedly t
Краткое содержание страницы № 6
Краткое содержание страницы № 7
Radio NEWS Standby Reception The following features are available only for FM Radio Data System stations. 1 (Hold) Searching for your favorite 2 Programmes—Programme Type (PTY) Search The unit will temporarily switch to News 1 (Hold) Programme if available. If the volume is adjusted during reception of Traffic Announcement or News, the adjusted 2 Select a PTY code. volume is automatically memorized. It will be applied the next time the unit switches to Traffic A
Краткое содержание страницы № 8
CD/USB CD/USB Playing a CD/USB device USB input terminal Label side USB 2.0 cable (not supplied) The source changes to “CD” and playback starts. The source changes to “USB” and playback starts. This unit can play MP3/WMA files stored in CD-R, CD-RW, and USB mass storage device (such as a USB memory and Digital Audio Player). Make sure all important data has been backed up. We shall bear no responsibility for any loss of data in USB mass storage class device while using this system. Ejected d
Краткое содержание страницы № 9
iPod/iPhone KD-R531 only Playing an iPod/iPhone USB input terminal USB 2.0 cable (accessory of the iPod/iPhone) The source changes to “USB” “USB-IPOD” and playback starts. 3 Select the desired track. Selecting the control mode / / Repeat this step until the desired track is selected. If the selected menu contains many tracks, you HEAD Controls iPod playback through this can fast search for the desired track by turning MODE unit. the control dial quickly. IPOD
Краткое содержание страницы № 10
External components External components For details, refer also to the instructions supplied with the external components. Playing an external component from Front/Rear AUX 1 Connect to F-AUX on the control panel and/or R-AUX on the rear panel. 3.5 mm stereo mini plug (not supplied) 2 Set the source as necessary. (Hold) Portable audio / player, etc. or Press MENU to exit. 3 Select or . 3.5 mm stereo mini plug (with “L” shap
Краткое содержание страницы № 11
Brightness adjustments Brightness adjustments You can select your preferred brightness for , separately. 1 2 Brightness button is only available for KD-R432/ BUTTON ZONE BUTTON 00 to 31 KD-R431. DISP ZONE DISP 00 to 31 For KD-R531, page 12. 3 Press MENU to exit. Sound adjustments Pro Equalizer Selecting the preset sound 1 You can select a preset sound mode, for each (Hold) individual source, suitable for the music genre. 2
Краткое содержание страницы № 12
Menu operations Menu operations 1 3 Repeat step 2 if necessary. (Hold) To return to the previous menu, press . To exit from the menu, press DISP or MENU. If no operation is done for about 60 seconds, the operation will be canceled. 2 Menu item Selectable setting (Initial: [XX]) DEMO For settings, page 4. CLOCK SET 24H/12H CLOCK ADJ *1 [AUTO]: The built-in clock is synchronized with the clock data received (Clock from the FM Radio Data System station. adjustment) OFF: Cancels. DIMMER SET Sele
Краткое содержание страницы № 13
Menu operations Menu item Selectable setting (Initial: [XX]) FADER *5*6 R06 — F06 [00]: Adjusts the front and rear speaker output balance. BALANCE *6 L06 — R06 [00]: Adjusts the left and right speaker output balance. LOUD ON: Boosts low and high frequencies to produce a well-balanced sound at (Loudness) a low volume level. [OFF]: Cancels. VOL ADJUST -05 — +05 [00]: Presets the volume adjustment level of each source, (Volume adjust) compared to the FM volume level. Before adjustment, select the
Краткое содержание страницы № 14
Menu operations Menu item Selectable setting (Initial: [XX]) SSM For settings, page 6. (Displayed only when the source is “FM”.) AF-REG *11 For settings, page 7. NEWS-STBY *11 ON/[OFF]: Activates or deactivates NEWS Standby Reception. (Displayed (News standby) only when the source is “FM”.) ( page 7) P-SEARCH *11 SEARCH ON/[SEARCH OFF]: (Programme Activates Programme Search (if is set to or search) ) or deactivates. MONO Displayed only when the source is “FM”. (Mona
Краткое содержание страницы № 15
Remote controller Remote controller This unit can be remotely controlled as instructed here (with an optionally purchased remote controller). We recommend that you use remote controller RM-RK52 with your unit. Replacing the lithium coin Using the remote controller battery Aim the remote controller directly at the remote sensor on the unit. If the effectiveness of the remote controller DO NOT expose the remote sensor to bright decreases, replace the battery. light (direct sunlight or artificia
Краткое содержание страницы № 16
Additional information Additional information Sampling frequency: About discs MP3: 48 kHz, 44.1 kHz, 32 kHz, 24 kHz, 22.05 kHz, 16 kHz, 12 kHz, 11.025 kHz, 8 kHz This unit can only play the following CDs: WMA: 48 kHz, 44.1 kHz, 32 kHz Variable bit rate (VBR) files. (The elapsed time for VBR files will not be displayed correctly.) This unit can play back multi-session discs; Unplayable files however, unclosed sessions will be skipped MP3 files: during playback. - encoded in MP3i and MP3 PRO fo
Краткое содержание страницы № 17
Additional information This unit may not recognize a memory card It is not possible to browse video files on the inserted into the USB card reader. “Videos” menu in . This unit may not play back files in a USB The song order displayed on the selection device properly when using a USB extension menu of this unit may differ from that of the cord. iPod. Depending on the shape of the USB devices When operating an iPod/iPhone, some and connection ports, some USB devices may operation
Краткое содержание страницы № 18
Troubleshooting Troubleshooting Symptom Remedy/Cause General No sound, sound interrupted or Check the cords, aerial and cable connections. static noise. Check the condition of the disc, connected device and recorded tracks. “MISWIRING CHK WIRING THEN Ensure the terminals of the speaker leads are properly insulated RESET UNIT”/“WARNING CHK with tape before resetting the unit. ( page 3) WIRING THEN RESET UNIT” If the message does not disappear, consult your JVC car audio appears on the display a
Краткое содержание страницы № 19
Specifications Specifications AUDIO AMPLIFIER SECTION Maximum Power Output 50 W per channel Continuous Power Output (RMS) 20 W per channel into 4Ω, 40 Hz to 20 000 Hz at less than 1% total harmonic distortion. Load Impedance 4Ω (4Ω to 8Ω allowance) Frequency Response 40 Hz to 20 000 Hz Signal-to-Noise Ratio 70 dB Line-Out, Subwoofer-Out Level/Impedance 2.5 V/20 kΩ load (full scale) Output Impedance ≤ 600Ω TUNER SECTION FM Frequency Range 87.5 MHz to 108.0 MHz Usable Sensitivity 9.3 dBf (0.8 μV/7
Краткое содержание страницы № 20
Merci pour avoir acheté un produit JVC. Veuillez lire attentivement toutes les instructions avant d’utiliser l’appareil afin de bien comprendre son fonctionnement et d’obtenir les meilleures performances possibles. IMPORTANT POUR PRODUITS LASER 1. PRODUIT LASER CLASSE 1 2. ATTENTION : N’ouvrez pas le couvercle supérieur. Il n’y a aucune pièce réparable par l’utilisateur à l’intérieur de l’appareil; confiez toute réparation à un personnel qualifié. 3. ATTENTION : Rayonnement laser visible et/ou i
Сегодня магнитола является неотъемлемой частью любого автомобиля. При этом она многофункциональна, выступает в качестве часов, радио, сабвуфера и прочего. Важно отметить, что они требуют дополнительной настройки. Если ее не выполнить, то магнитола способна лишь воспроизводить музыку.
Процесс настройки магнитолы JVC не сложный, но имеет свои особенности. Поэтому прежде чем приступить к данной работе, необходимо ознакомиться с самим устройством, его характеристиками и свойствами. Это поможет выполнить задуманное быстрее и проще.
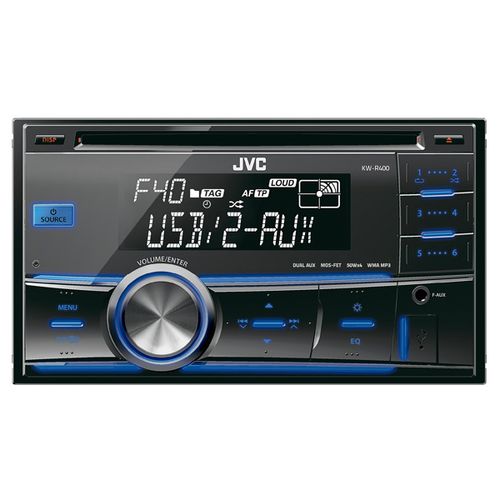
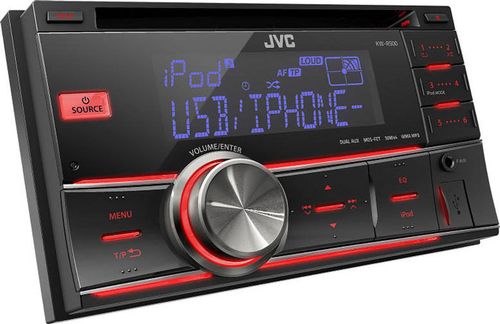
Магнитола JVC
Магнитола JVC: особенности устройства
Продукция компании JVC на рынке известна давно. Она зарекомендовала себя как высококачественная и многофункциональная техника. Кроме этого, данный производитель известен необычными головными устройствами.
Так, все автомагнитолы JVC имеют нестандартный внешний вид. В основном он достаточно прост, но это никак не сказывается на функциональных способностях устройства, которые способны удивить любого меломана.
Есть один небольшой минус. Он заключается в том, что на консоли кнопки пластиковые, окрашены в серебристый цвет. Поэтому некоторые ошибочно думают, что они из алюминия. Кроме этого, на дисплее отображается название файла, но не на кириллице. Это доставляет массу неудобств российским пользователям. Что касается управления, то магнитола достаточно проста. С данной задачей справится любой, даже дилетант.

Как правильно настроить магнитолу JVC: советы
Правильная настройка автомагнитолы является залогом ее стабильной и длительной работы. Поэтому к данному процессу необходимо подходить крайне внимательно и ответственно. Причем, чтобы это сделать, можно обратиться к специалисту, но если вы хотите сэкономить деньги, то попробуйте самостоятельно. Как показывает практика, работа несложная и под силу любому.
Начать необходимо со сброса настроек. После этого можно отрегулировать кроссоверы. При этом важно согласовать все уровни сигнала.
После того как в систему будет вставлен музыкальный компакт-диск, можно переходить к настройке воспроизводимого звука. Для этого необходимо воспользоваться функцией AudioControl. Она поможет выполнить эту работу максимально точно и качественно.
Только после проведения данных мероприятий можно прослушивать аудиосистему. При этом стоит использовать различные вариации, которые предлагает устройство. Также стоит регулировать звук динамиков, которые расположены по разным сторонам. Это позволит получить наилучшую звуковую картину и качественное звучание магнитолы.
Как настроить время на магнитоле JVC?
Часы – довольно важная функция, которой обладает магнитола, предназначенная для использования в транспортном средстве. Современный человек вынужден постоянно следить за временем, поэтому очень удобно, когда оно воспроизводится в автомобиле.
Конечно, при выпуске производитель не устанавливает текущее время. Поэтому хозяину часов необходимо знать, как настроить часы на магнитоле JVC, и сделать это самостоятельно. В этом поможет наша пошаговая инструкция.
Первый этап заключается в том, чтобы войти в меню аудиоустройства. Потом необходимо выбрать пункт Time, в котором будет проводиться основная настройка текущего времени. На дисплее появится конфигурация вывода данных. Она может быть 24- или 12-часовая. Кроме этого, необходимо выбрать московский пояс или соответствующего региона России, в котором вы проживаете. Автоматически во всех устройствах стоит лондонское время.
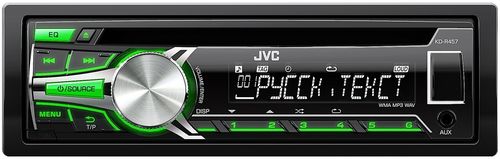
Далее необходимо воспользоваться пунктом Settin. Оно используется для установки времени в часах и минутах. Чтобы данные сохранились, потребуется использовать команду Save. Таким образом можно и корректировать текущее время.
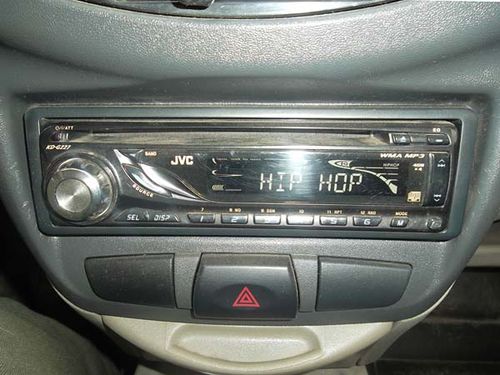
Настроить радио на магнитоле JVC
Для этого потребуется присоединить к устройству антенну, как показано на фото. Она может устанавливаться как в машине, так и снаружи. Главное, чтобы она поддерживала диапазон АМ/FM радиосигналов. После этого можно переходить к основной настройке. Для этого перевести устройство в режим радио. С помощью кнопок вверх и вниз вручную или воспользоваться функцией автопоиска. После настройки можно их пронумеровать. Это упростит их использование и сократит время поиска необходимой радиостанции.
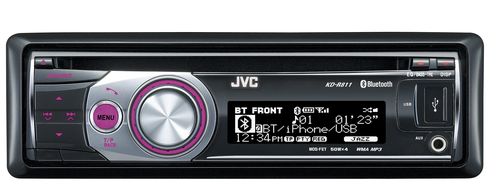
Настройка блютуз на магнитоле JVC
Функция блютуз позволяет сопрягаться с другими устройствами и воспроизводить информацию на магнитоле. Самый яркий пример, это телефон. Чтобы настроить данную функцию, необходимо использовать кнопку config. В появившемся меню отыскать функцию Bluetooth и включить ее. Поможет в проведении данных манипуляций колесо menu-tune. После этого можно добавлять новые устройства для сопряжения. Проводится это с помощью соответствующей функции. Также можно выполнить поиск нового устройства.

Посмотреть инструкция для JVC KD-R531 бесплатно. Руководство относится к категории Автомагнитолы, 1 человек(а) дали ему среднюю оценку 8.5. Руководство доступно на следующих языках: английский. У вас есть вопрос о JVC KD-R531 или вам нужна помощь? Задайте свой вопрос здесь
Нужна помощь?
У вас есть вопрос о JVC а ответа нет в руководстве? Задайте свой вопрос здесь Дай исчерпывающее описание проблемы и четко задайте свой вопрос. Чем детальнее описание проблемы или вопроса, тем легче будет другим пользователям Samsung Galaxy A7 предоставить вам исчерпывающий ответ.
Высвечивается : проблема с проводкой
Количество вопросов: 1
Технические характеристики JVC KD-R531
Ниже вы найдете технические характеристики изделия и руководства по эксплуатации JVC KD-R531.
| Бренд | JVC |
| Модель | KD-R531 |
| Изделие | Автомагнитола |
| EAN | 4975769394324 |
| Язык | английский |
| Тип файла |
Часто задаваемые вопросы
Не можете найти ответ на свой вопрос в руководстве? Вы можете найти ответ на свой вопрос ниже, в разделе часто задаваемых вопросов о JVC KD-R531.
FM означает "частотная модуляция", AM - "амплитудная модуляция". Основная разница между FM- и AM-радиостанциями состоит в качестве звука.
Уровень звука выше 80 децибел может нанести вред слуху. Уровень звука выше 120 децибел может нанести прямое повреждение слуху. Вероятность повреждения слуха зависит от частоты и продолжительности прослушивания.
Если автомобильный радиоприемник не включен, на него не будет подаваться питание. Убедитесь, что красный провод подключен к контактному источнику питания, а желтый провод — к источнику питания постоянной мощности.
Для удаления отпечатков пальцев лучше всего использовать слегка влажную салфетку для уборки или мягкую чистую ткань. Пыль в труднодоступных местах лучше всего удаляется потоком сжатого воздуха.
Bluetooth - это способ обмена данными по беспроводной сети между электронными устройствами с помощью радиоволн. Расстояние между двумя устройствами обменивающимися данными в большинстве случаев составляет не более десяти метров.
К сожалению, у нас нет руководства для JVC KD-R531, доступного в русский. Это руководство доступно в английский.
Похожие руководства по эксплуатации

JVC KD-R431

JVC KD-R331

JVC KD-R521
JVC KD-G531

JVC KD-R45
ManualsPDF . ru
Читайте также: